*Affiliate links provided for your convenience. For more info, see my full disclosure here.
Hey, Friends! I have such a fun post for you today! I participated in a blogger Christmas ornament exchange! There are 47 bloggers participating this year! We paired up and created an ornament for each other for $15 or less, wrote a tutorial on how we made them for you all, then shipped them off to each other! How fun is that?!

And, better yet, I was paired up with the fabulous mother/daughter team 2 Bees in a Pod! I love Vicki and Jen–they are both so creative and do such a great job decorating their homes and are the sweetest people! You have to see how they use cobalt blue glass in their decor. It’s so gorgeous! It was so fun to make them something for their tree and I absolutely love the ornament they made for mine! Be sure to go see it here!
Meet all the 2017 Ornament Exchange Hosts
Erlene ⋅ My Pinterventures Kim · Made In A Day Pili ⋅ My Sweet Things
Amanda · Domestically Creative Shirley · Intelligent Domesticatons
Michelle · Our Crafty Mom Beverly · Across the Blvd. Cindy ⋅ DIY Beautify
Christene · Key to Inspiration Nicki · Sweet Parrish Place Katrin ⋅ Kreativ K
Megan · C’mon Get Crafty Hilary · Raising Fairies and Knights
Emily · Two Purple Couches Tina · One Crafty Mess Marie · The Inspiration Vault
Debra · Shoppe No. 5 Trisha · Rosewood and Grace Jeanie · Create and Babble
Terri · Christmas Tree Lane Maureen · Red Cottage Chronicles Toni ⋅ Small Home Soul
Ula ⋅ Lulu & Celeste Sue ⋅ A Purdy Little House Pamela · Home On The Corner
Lorelai ⋅ Life with Lorelai Debbie ⋅ Tweak and Style Stephanie ⋅ Swoodson Says
Chelc ⋅ Inside the Fox Den Susan ⋅ Super Mom – No Cape! Molly ⋅ Just a Little Creativity
Roseann ⋅ This Autoimmune Life Angela ⋅ Simply Beautiful by Angela
Vicki and Jenn ⋅ 2 Bees in a Pod Joanne ⋅ Our Unschooling Journey
Tylynn ⋅ Bitterroot DIY Sam ⋅ Raggedy Bits Mary ⋅ The Boondocks Blog
Cyn ⋅ Creative Cynchronicity Dione ⋅ Clever Chameleon Quilting Erica ⋅ Erica Ever After
Chelsea ⋅ Love Paper Crafts Evija ⋅ From Evija with Love Anne ⋅ Orange Bettie
Samantha ⋅ Little Bits of Home Hope ⋅ Hopes Crafty Niche Pam · P.S. I Love You Crafts
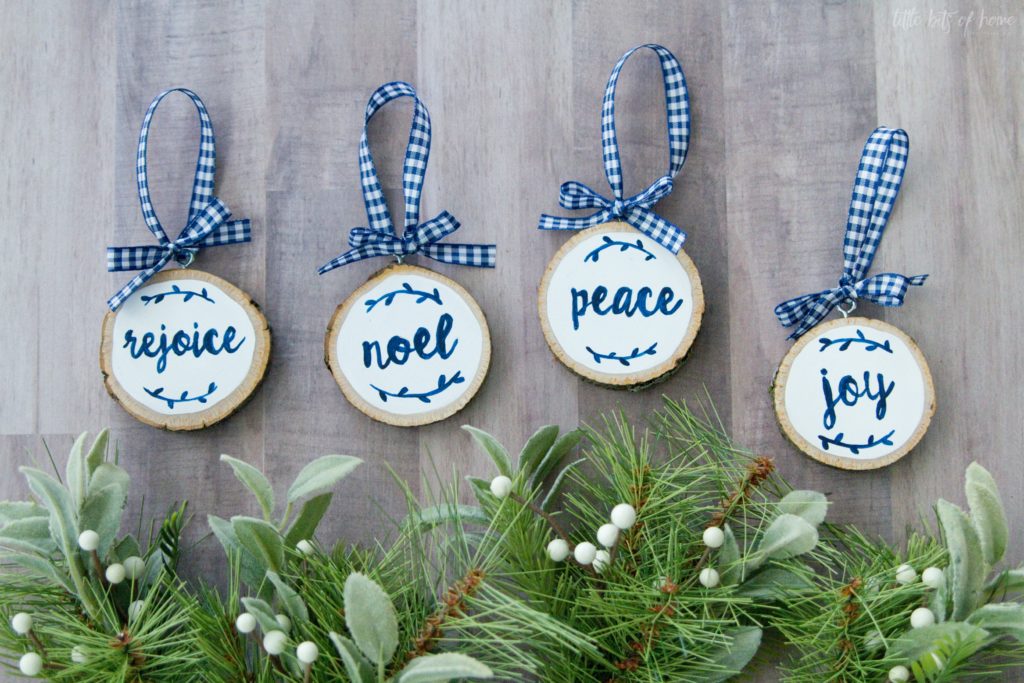
Alright, are you ready to see what I made? Vicki’s tree is a woodsy, lake style (see it here!), so I wanted something that coordinated with that style. I decided to go with a natural wood vibe and created hand lettered wood slice ornaments!
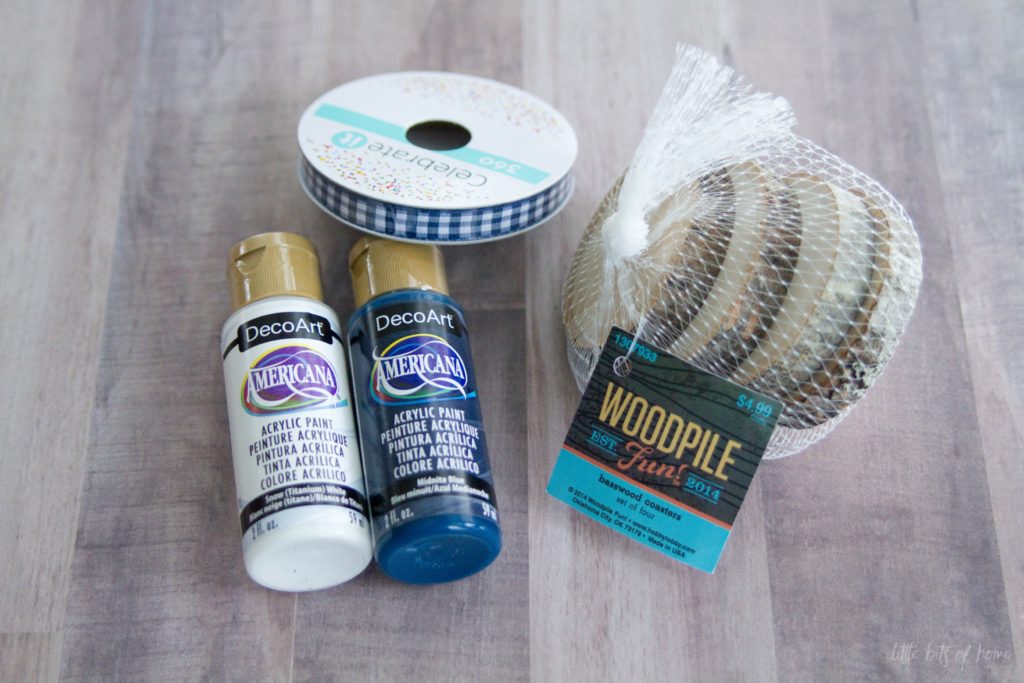
I picked up a package of wood slices, acrylic paints, and buffalo check ribbon from Hobby Lobby to get started.
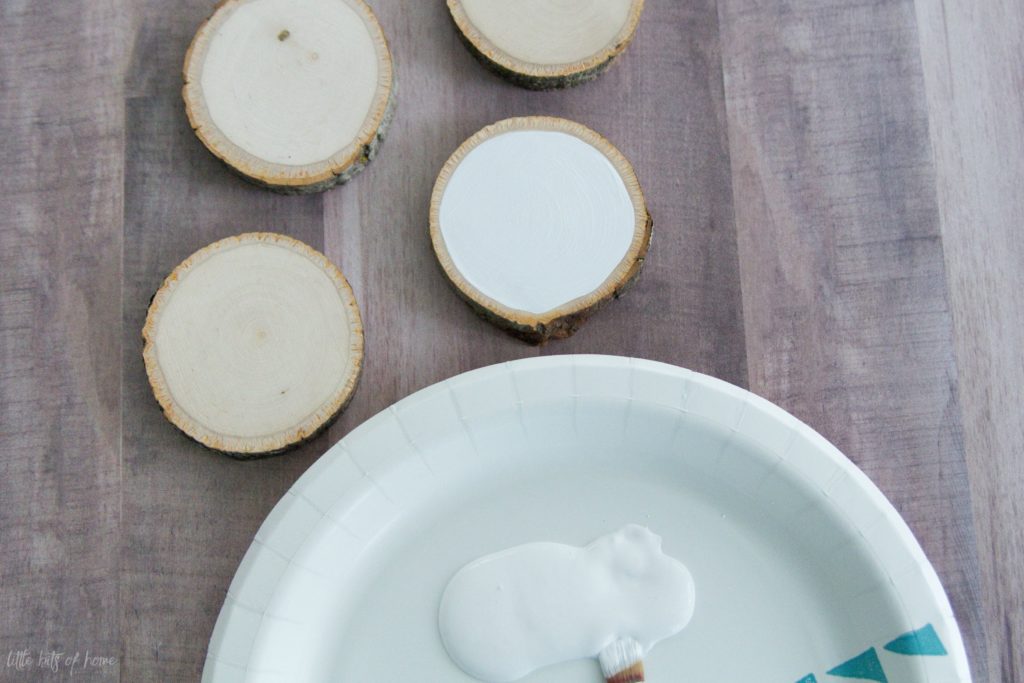
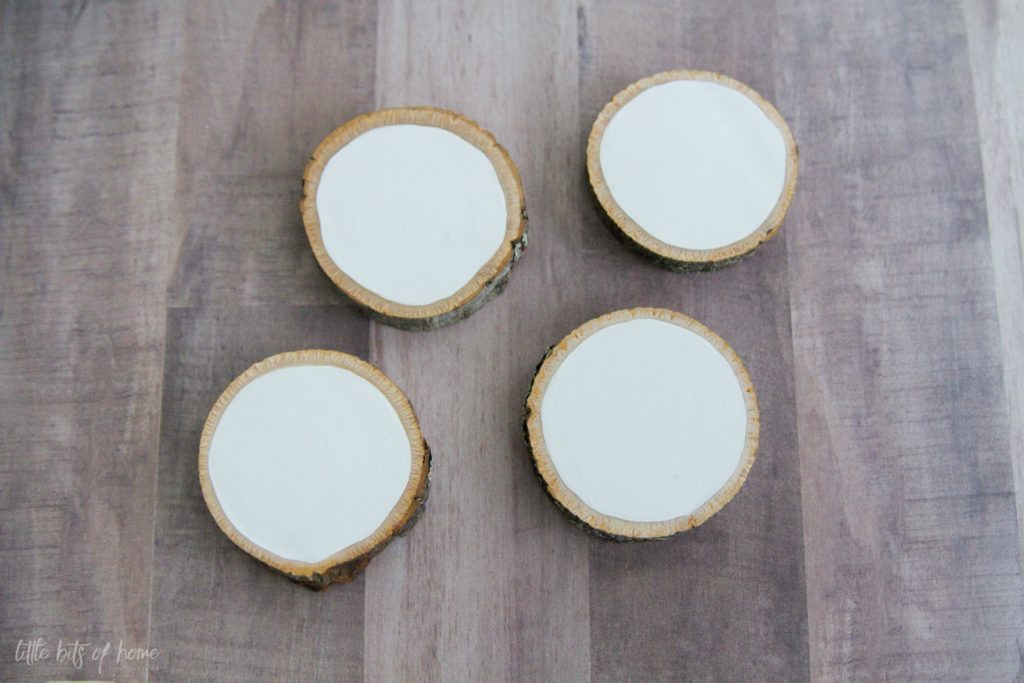
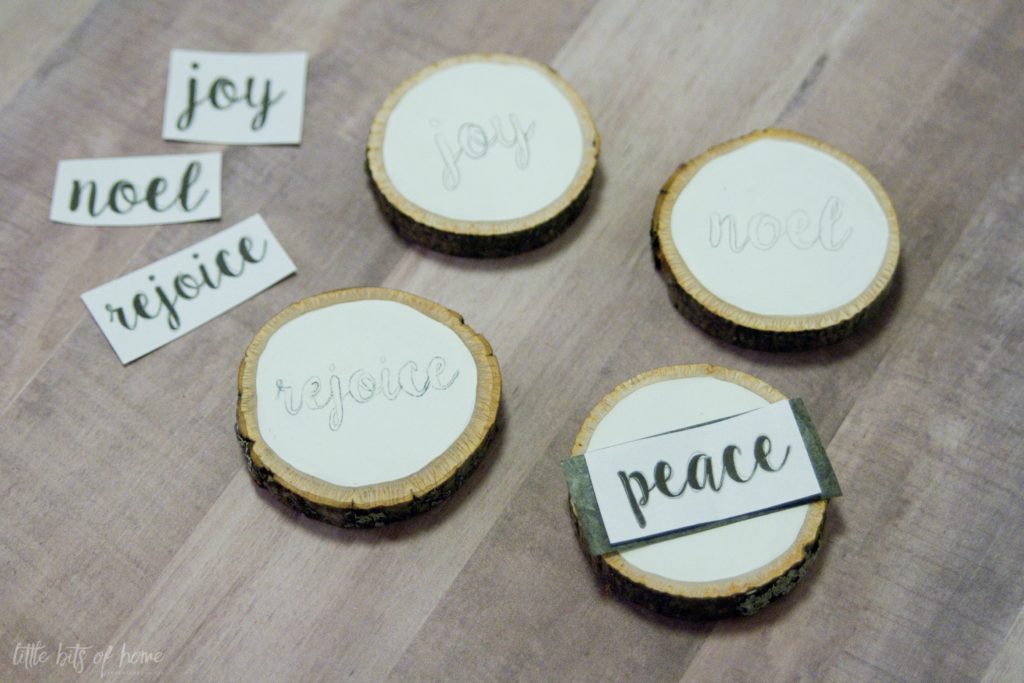
I started by painting the insides of each wood slice white. I did not try to make this part perfectly round. Instead, I followed the natural circle in the wood. I think it adds character and keeps the ornament looking rustic.
Once the insides were painted, I typed out the words I wanted to paint in the font and size I needed, then printed them out. I cut them out and laid them on top of a scrap of transfer paper, then used a pen to outline the text. I used the exact same process that I used for my Lettered Wood Sign Tutorial, just on a smaller scale. Click here for the lettered sign tutorial!
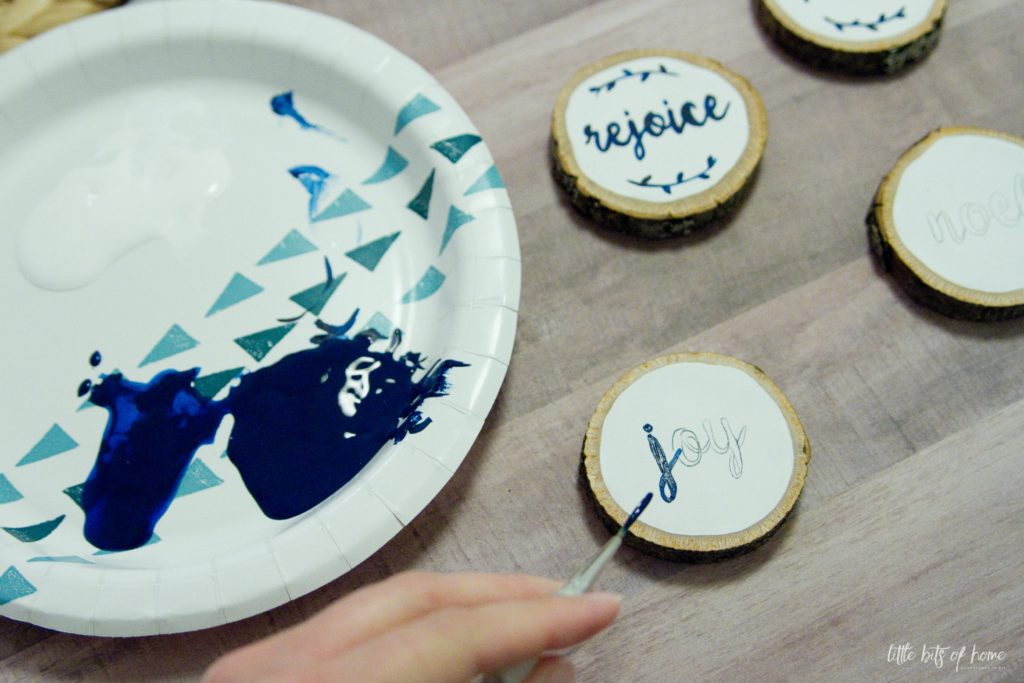
I used my trusty liner brush to fill in the text with navy blue paint, then free handed the little stems. The stems were a last minute addition–I just thought the ornaments needed a little something extra. I love how they turned out! Again, I explained this step in more detail over on my sign tutorial, so check it out if you want liner brush tips!
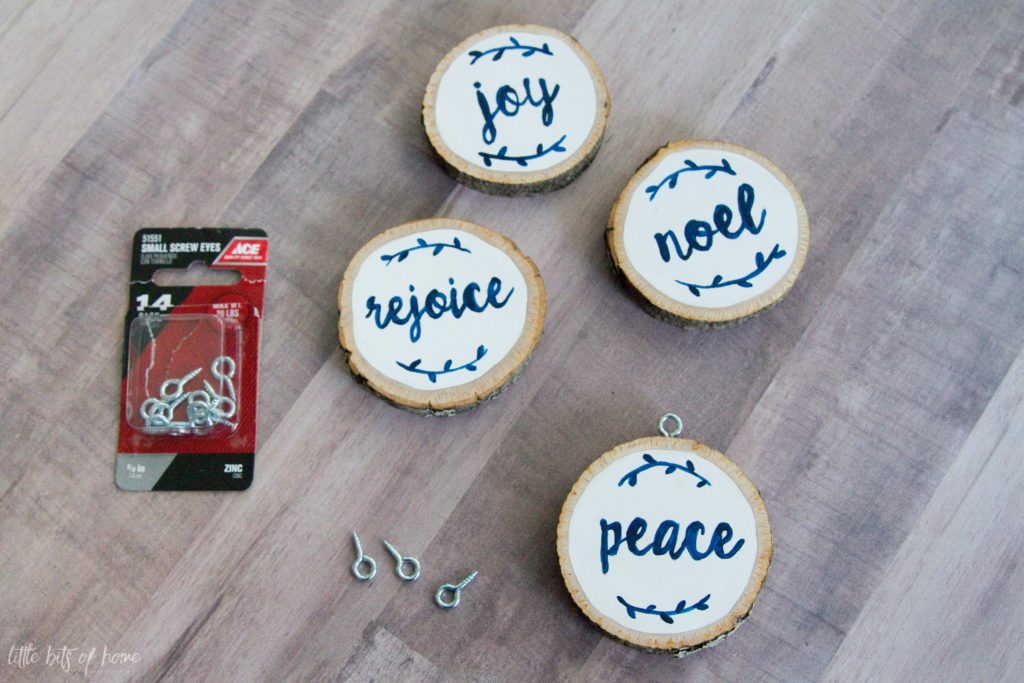
To hang my ornaments, I screwed in small screw eyes for the ribbon to hang from. The wood slices were soft enough that I was able to just screw them in by hand, no tools needed. I found my screw eyes for just a couple dollars at Ace, but I couldn’t find them online. These look similar and are the same size, but are more expensive, so I’d recommend checking your local hardware store.
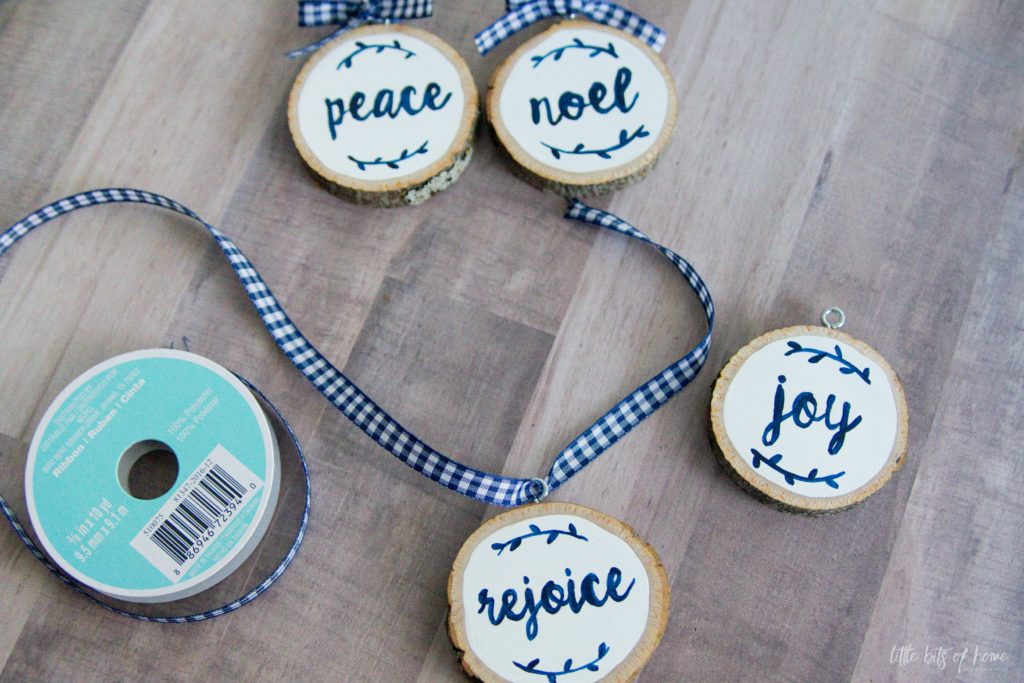
Finally, I strung my ribbon through the screw eyes and finished it off with a bow!
I think they turned out so cute! My friend Laura and I were talking the other day about saving slices from our Christmas tree trunks, but not knowing what to do with them. I think this would be such a fun thing to do with a slice from your Christmas tree trunk, maybe adding the date to the back and a special memory from that year!
What are your favorite DIY ornaments? I’d love to hear about them!
FIND ALL 47 HANDMADE ORNAMENT TUTORIALS BELOW AND SHARE YOURS TOO! Use Hashtag #2017OrnamentExchange so we can see your creations on social media.

Dearest Samantha – Thank you! I LOVE LOVE LOVE my ornaments! They are super cute and absolutely perfect! I can’t wait to put the Christmas tree up this weekend! These sweet ornaments will be the first addition! Your attention to detail is amazing! May you and yours have a blessed holiday season.
Those are adorable! I love the addition of the stems and leaves too; it fills in that empty space perfectly. Pinned.
These ornaments are absolutely beautiful, I love the lettering and woodslices are just gorgeous!! #2017OrnamentExchange
The Ornaments are terrific. I love how you customized the color to go with the decor. And what a wonderful idea to make your own wood slices.
I am obsessed with hand lettering and love love the blue and white! These will be beautiful on their tree!
Samantha these are the prettiest and loveliest ornaments! I love the wood slice look, the lettering and that ribbon is just perfect!
How pretty! Such a fun color and the lettering looks wonderful. Pinning.
THese are very cute! I have some wood slices and these would be perfect! Thanks for the inspiration!
These turned out so cute Amanda!
Samantha these are absolutely adorable. That blue ribbon really makes the stand out too.
These are just so cute! I love that you hand painted them. It added that extra handmade touch.
These are so pretty. I love blue, but I never think to use it for Christmas. The ribbon is such the perfect finishing touch. Well done!
These are perfect for your partner’s lakeside tree! I’m sure she loved these hand painted wood slice ornaments. Thanks for sharing your tutorial on the #2107Ornamentexchange.
I adore these, Samantha! And they fit perfectly with Vicki’s style!
That looks so elegant. How beautiful for a blue themed tree.
I pinned to my group board. Love participating in the Ornament Exchange I get such amazing ideas!!
I love rustic ornaments and the check ribbon looks perfect! easy and fun tutorial!!
These are beautiful ornaments, and I love the lettering. I need to try your transfer method!