Do you ever get project ideas where even you think you’re crazy and it’s going to turn out horribly? This project was totally one of those. But, I was determined to make it work and it actually turned out better than I thought! #winning

If you’ve been reading this blog a while, you know that I can’t sew. It is just not a power I posses…and I’ve tried. Oh, I’ve tried. 😉 I finally gave up and donated my sewing machine. The horror!
Unfortunately, my lack of sewing abilities costs me in the decorating department. I see all.the.cute things but can’t make them myself and can’t afford to pay someone to make all.the.things for me! Cue, my crazy project idea…
I really, really wanted some cute fall pillows for my front porch. I was feeling southern and cutesy and thought a little pumpkin pillow (or five, ha!) would be adorable. So, what’s a non-seamstress to do? Hot glue it! Oh yeah, baby! It actually worked really well and now I’m the proud owner of adorable pillows that I made myself on the cheap. Woot woot! Picture me dancing around my living room, twirling my pumpkin pillow.
Ready to see how I did it? I took a million pictures of the process so that you other non-seamstresses could make these little fluffy lumps of adorableness, too! Non-sewers unite!
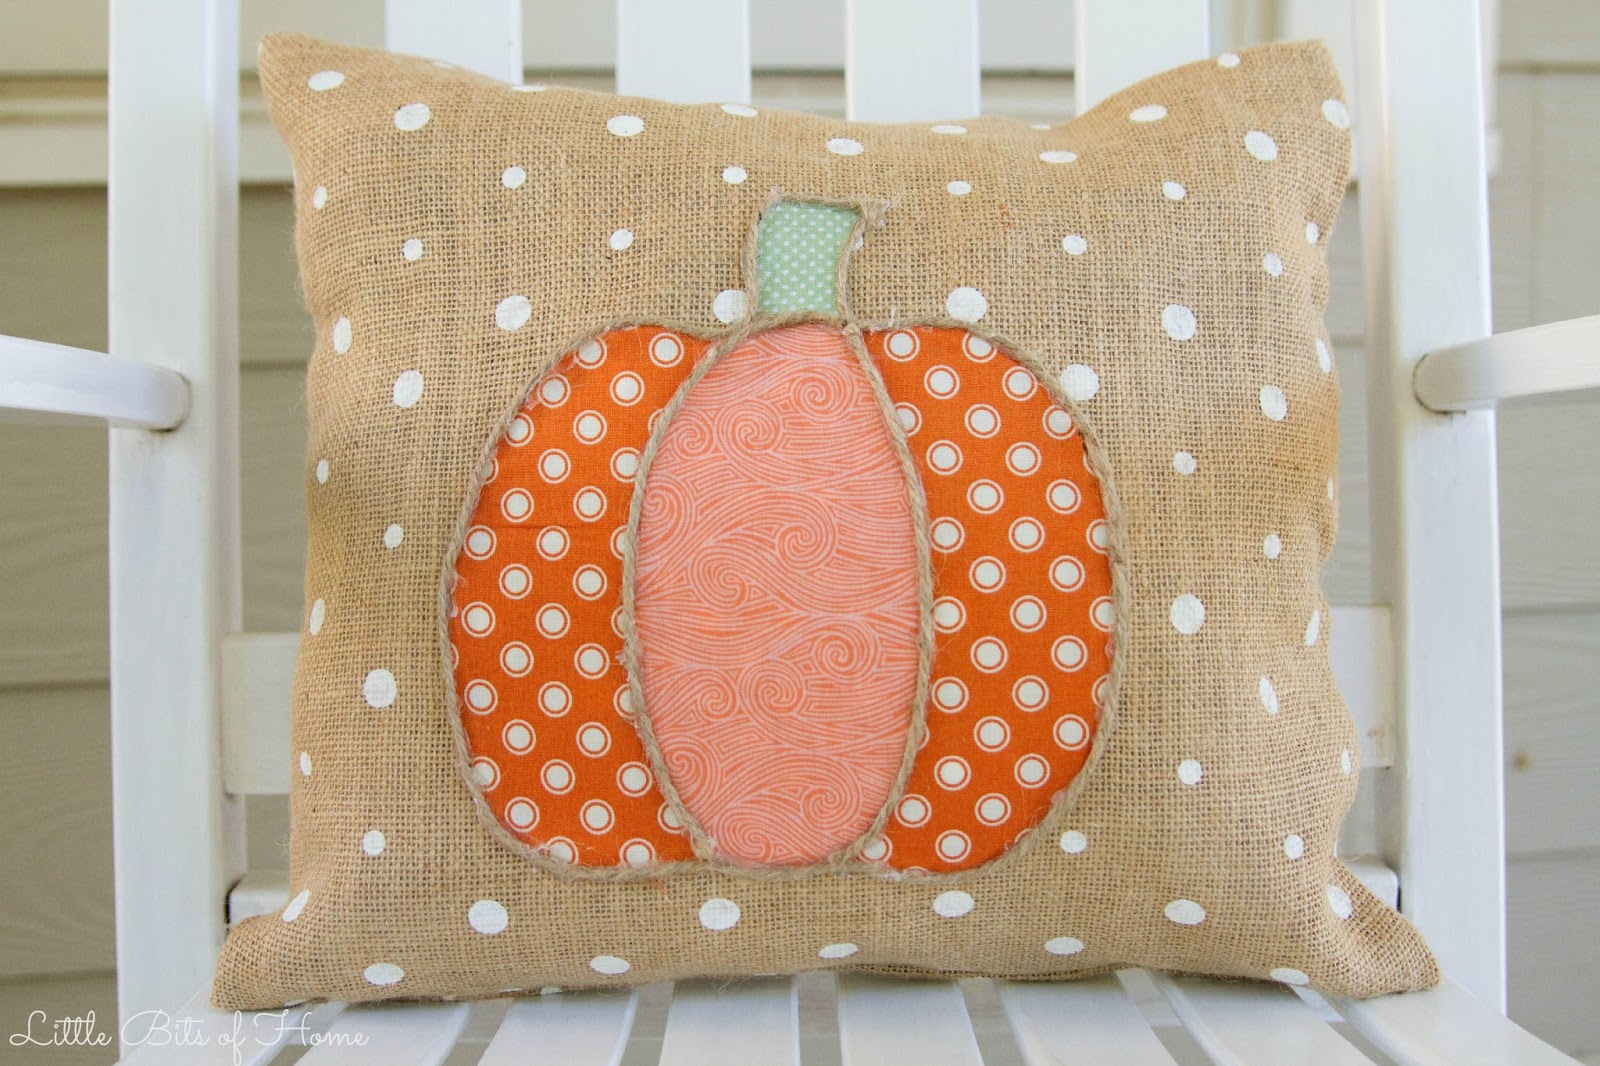
Step One: Gather scraps of coordinating fabrics and burlap. I found this adorable polka dotted burlap at Joann’s!

Step Two: Cut two pieces of burlap into desired shape, slightly larger than you want the finished size.

Step Three: Lay the burlap pieces on top of each other with the right/patterned sides facing the inside.

Step Four: Carefully lift the top piece and add a line of glue where you want your seam, leaving about an inch of extra fabric on the outside. Then lay the top piece back in place and firmly press your fabric along the line of glue. Make sure you do this on a surface you don’t care about or lay down old newspapers, as the glue can seep through the burlap a bit when you apply pressure.
Repeat this step on three of the four sides. Make sure to leave the fourth side open so you can add filling!

I was distracted trying to take a picture and glue at the same time, so accidentally did my line of glue too far from the edge. I discovered if you don’t touch the glue and let it dry, you can peel it off. Just a tip in case you mess up!
Step Five: Turn the pillow cover right side out, reaching inside and making sure to get the corners and seams well turned out. I pressed along each seam to get a good, crisp line.

Step Six: Onto the pumpkin! Grab a patterned fabric and lightly draw the outline of a pumpkin on the back of the fabric, then cut it out. You could also trace a picture of a pumpkin if you don’t trust your drawing skills!
I wanted to use multiple fabrics for my pumpkin for an added touch, so I grabbed a coordinating fabric and drew and cut a football shape to use for the middle of the pumpkin. Then, I traced and cut a stem out of green fabric.

Step Seven: Arrange the pumpkin pieces onto the pillow, making sure to make the open end of the pillow the bottom. Slip a piece of cardboard inside the pillow so the glue won’t seep through. I had just worked on two lumbar pillows that closed on the side, so made the open part on this square pillow facing the side, too, without thinking. I wish I had put the open side on the bottom instead, since the final seam doesn’t lay quite as flat as the other three seams. (That’s true of sewn pillows as well.)

Step Eight: Working in small sections, lift the pumpkin fabric up and add a line of glue close to the edge of the fabric. Carefully lay it back down on the pillow and press and rub firmly to adhere the glue. Do this all the way around the perimeter of each fabric.

Don’t let the pillow switch out in the picture confuse you! I tried to glue too much at once on the first pillow and burned my finger, so I had to take a new picture of this step for you on my second pumpkin pillow. Don’t be like me, glue in small, 2″sections!
Step Nine: Working in small sections, glue jute twine around the perimeter of each fabric to seal off the raw edges and add a cute, finishing touch. Use a toothpick to remove any excess glue that seeps out while it’s still hot.

Step Ten: Remove the cardboard, stuff the pillow, then fold the last open side of the pillow down toward the inside about an inch all the way around. Add a line of glue close to the inside of the folded edge and press to seal.

DONE!

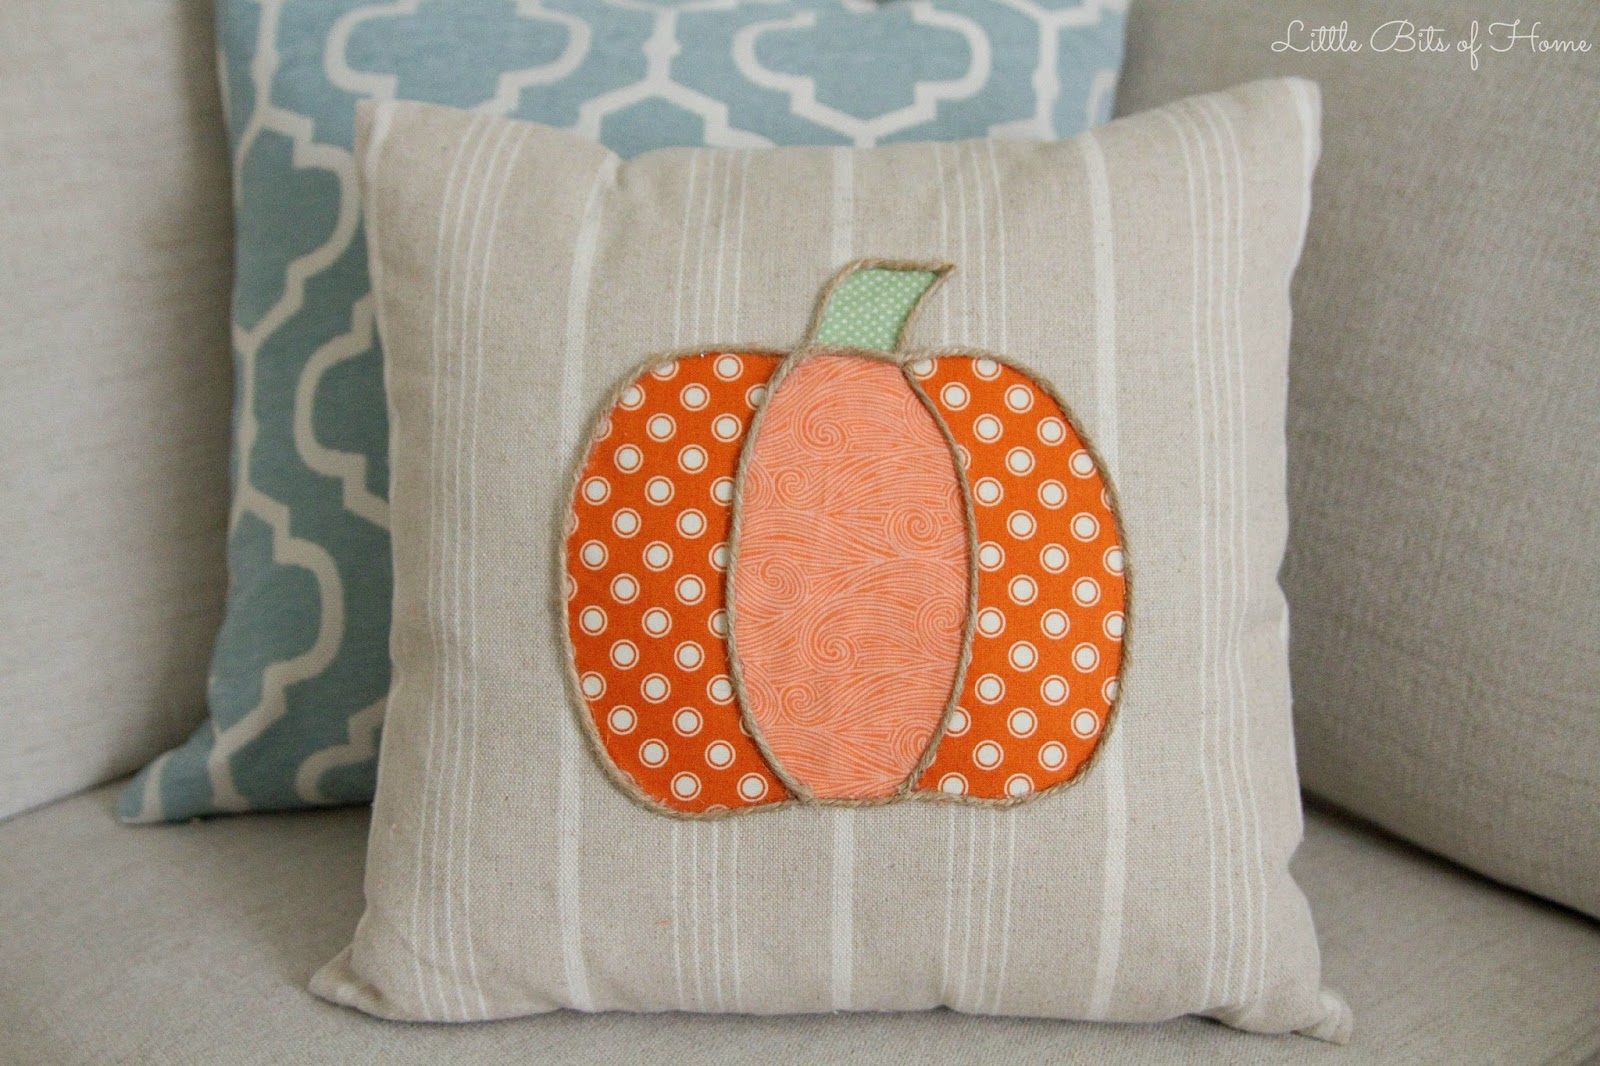
I love, love, love how it turned out! I loved it so much, in fact, that I added a pumpkin to this $8 Michael’s clearance pillow so that I could have one for my living room, too! Isn’t it adorable?!
I also used this method to make two burlap lumbar pillows for my adirondack chairs on the back deck! I specifically picked burlap fabric since I knew the glue would adhere well to the rough, hairy texture. I really want to try this method out on a drop cloth, though, and see if that fabric would work, too. It’s a lot smoother, so I’m not sure how well the glue would hold. I’ll have to try it and report back!
Hope this inspires you to cutesy up your porch whether you can sew or not! The possibilities are endless!
Linking up to Savvy Southern Style, Remodelaholic, and many other awesome blogs!

Awe this is super cute for Autumn 🙂
Such a cute pillow!!
Your pumpkin pillow is awesome!!! It caught my eye at the Creativity Unleashed party. Pinned to share.
Oh my goodness…I am definitely afraid to sew (I can never get past threading the dang bobbin) so this is right up my alley! Thank you so much for the awesome tutorial. Pinning this for later 😀
Thank you!
Thanks!!
Yes! Someone that understands the horror of trying to thread the bobbin! That's the worst! Hot glue for the win! 🙂
Thank you so much!
Lovely! I can sew, but really (really!) don't like too! I have even hot glued my cushion covers for my outdoor swing. Here is the link if you would like to take a look- http://homeonthecorner.com/2015/03/30/recovering-my-outdoor-swing-cushions-i-cheated-a-little/. Just goes to show…you don't always need to sew things to make it pretty!! I will be making pillows your way from now on!!
Great job…love it!!!!
Love your cute pumpkin pillow! Such a cute idea. ~Amy
Your pillow is so cute! It will be featured at Wow Us Wednesdays tomorrow night.
This is so adorable and no sew is the best!! I really love the fabrics you selected, too. Sometimes just picking out the fabric is so much fun!
Carrie
curlycraftymom.com
That is so cute! I do sew, but I still think it is a very cute and clever idea!
Cutest pillow, ever!!! 🙂
You had me at no sew-love love this! Pinned! 🙂 Saying hello from hit me with your best shot! You have a great blog! 🙂
Cathy@threekidsandafish.com
So cute and gotta love a good no-sew project! Thanks for sharing with the Pretty Preppy Party! – Heather http://www.southernstateofmindblog.com/
This is so cute! And while I have a sewing machine I honestly don't know how to use it that well so this is perfect. I especially love the polka dot one.
that is really cute 🙂
You are welcome to join my BlogParty
SATURDAY SHOW OFF
Hugs from Håkan in Sweden
This is adorable, perfect for the non sewer.
Thank you!
Found this on Beauteeful Living and just had to pin and share. You gave your sewing machine away and I gave my glue gun away. I never think to use a glue gun. But I will definitely be making this pillow come glue or thread. 🙂
Just a friendly note to let you know that this project was featured today on my post of 20 Pumpkin Crafts! Hope you'll come by and check out the amazing Halloween inspiration!
http://www.thejohnsonsplusdog.com/2015/10/13/fall-favorites-20-pumpkin-crafts/
This is so darling as well! Nice job!