*Affiliate links noted in italics and provided for your convenience. For more info, see my full disclosure here.
Hey, Friends! I’m sorry things have been painfully quiet over here on the blog lately! We have had round after round of sickness. Oh, wintertime germs… 🙁 Thankfully, the kids and I are better, just waiting on Jeremy to finish healing up!
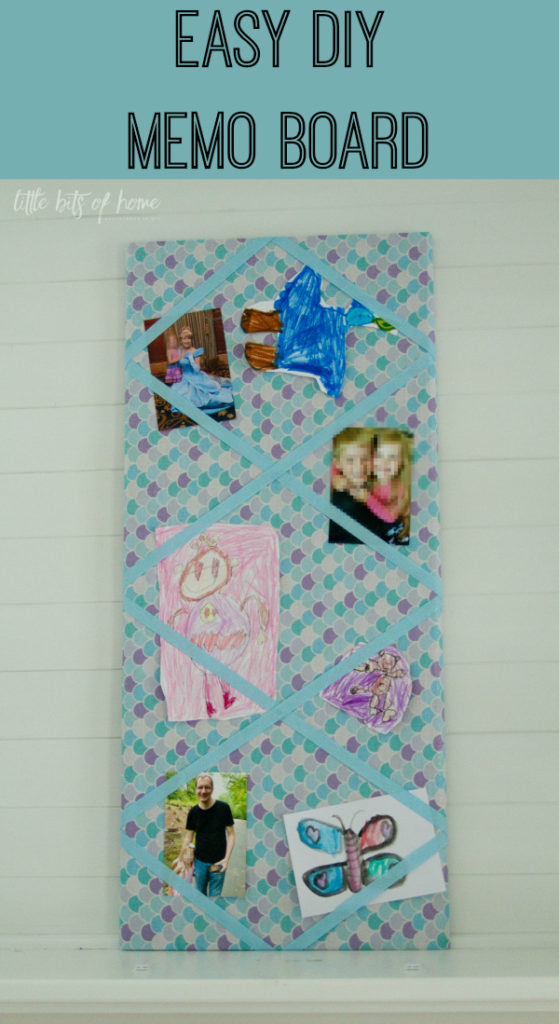
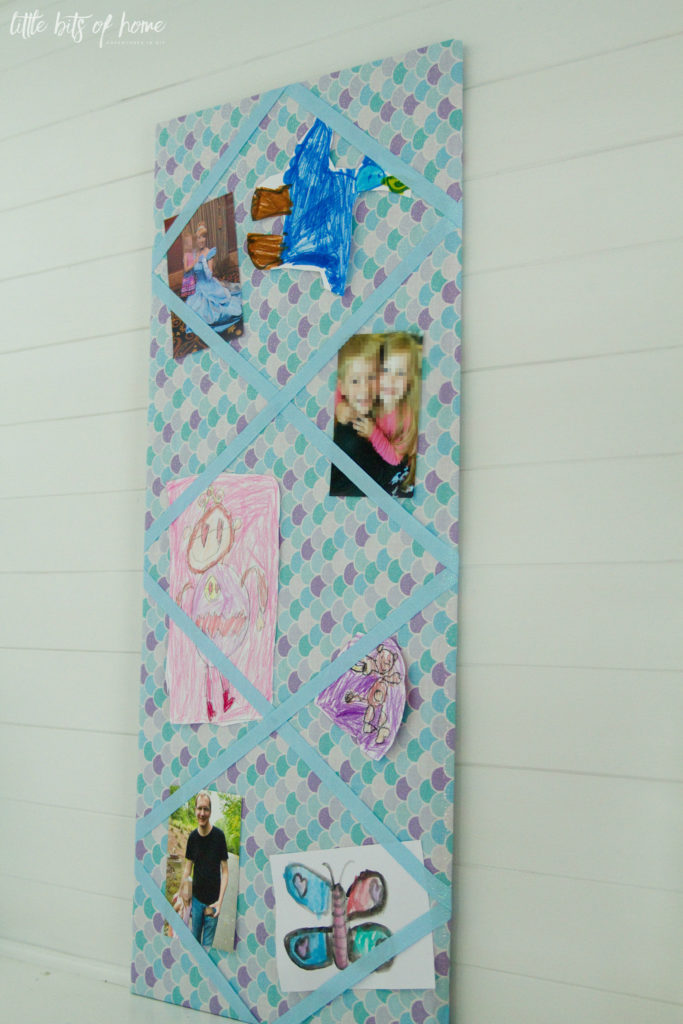
I’m so excited to announce that I’ve teamed up with a group of blogger friends to do a year long monthly DIY challenge for you all! This month’s topic is DIY home organization! We have been working on tying up loose ends in Little Girlie’s room, so for this month’s project, I’m tackling the paper clutter. Both of my kids love to draw, but we don’t have enough places to display their work. I decided to make both kids a message board to hang on the back of their door. That way, they can hang up their recent drawings and photos and switch it up to their heart’s content! No more piles of papers stashed all around!
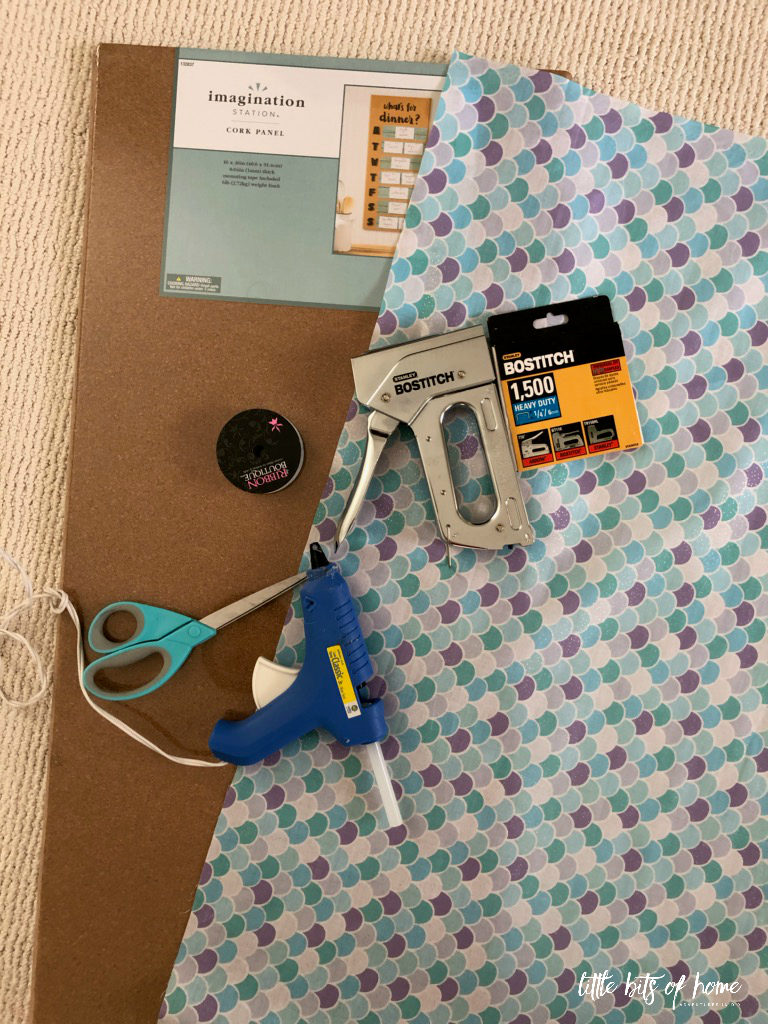
Here’s what I started with:
–16×36″ cork panel from Hobby Lobby (only $8.34 if you use a 40% off coupon!)
-Fabric (I highly recommend steaming the fabric first to get out the wrinkles…my iron just wasn’t cutting it. I just found this steamer and really like it!)
-Ribbon
-Scissors
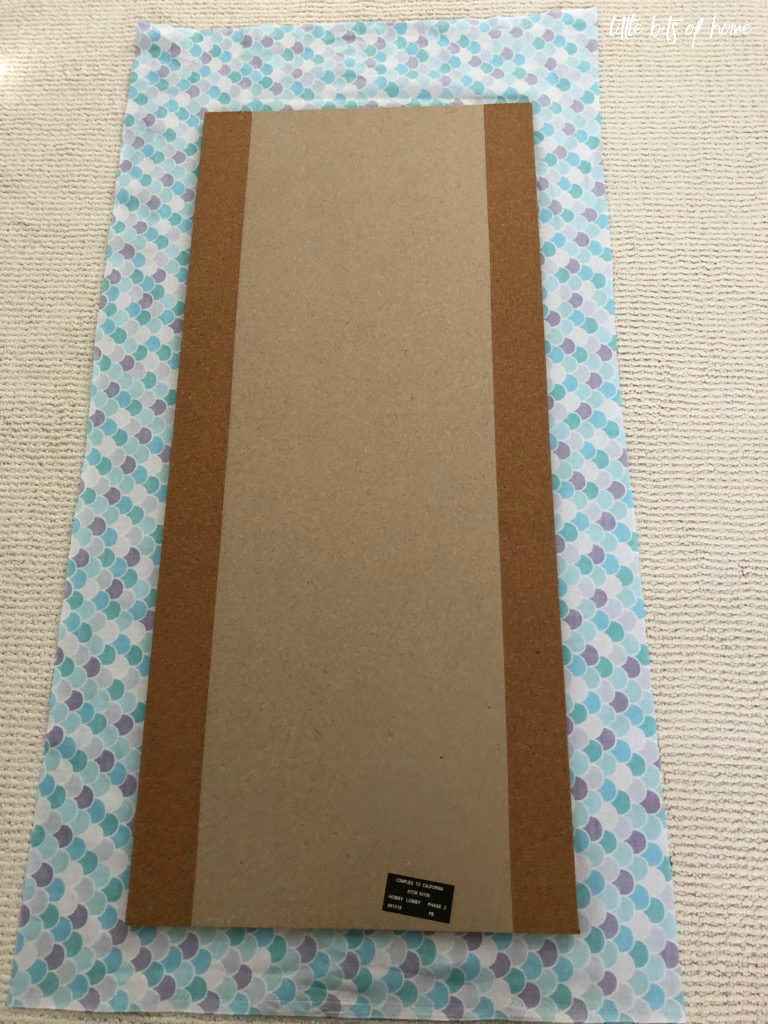
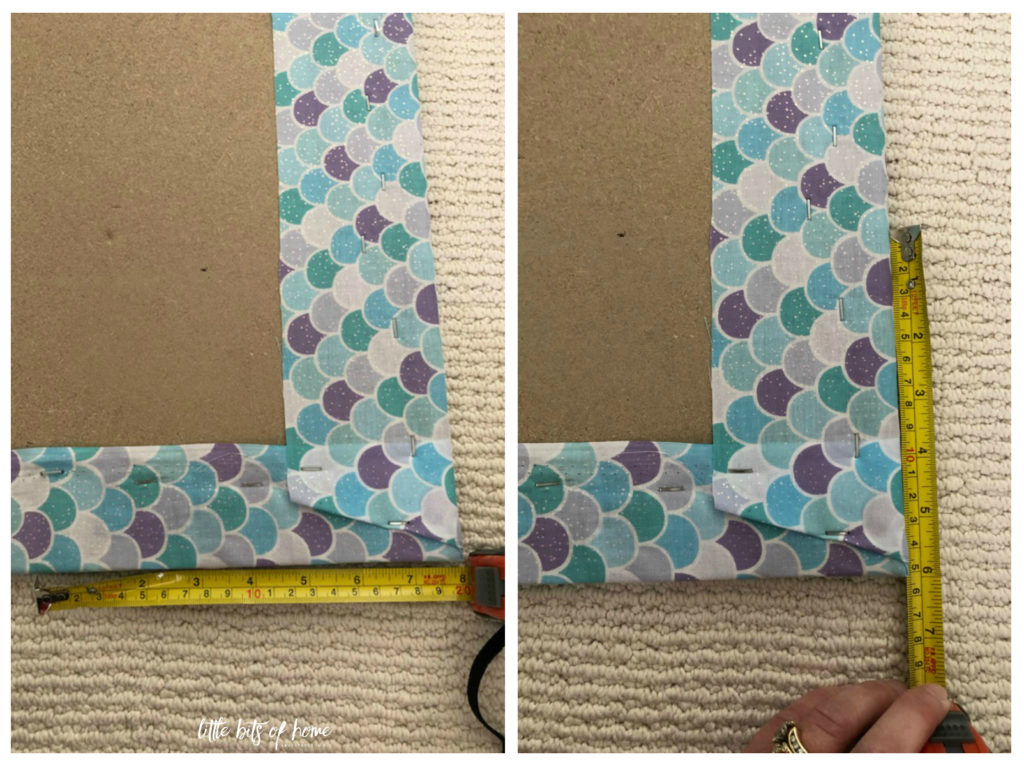
I flipped my fabric over so the good side was facing down, then laid my cork panel on top, also facing down.
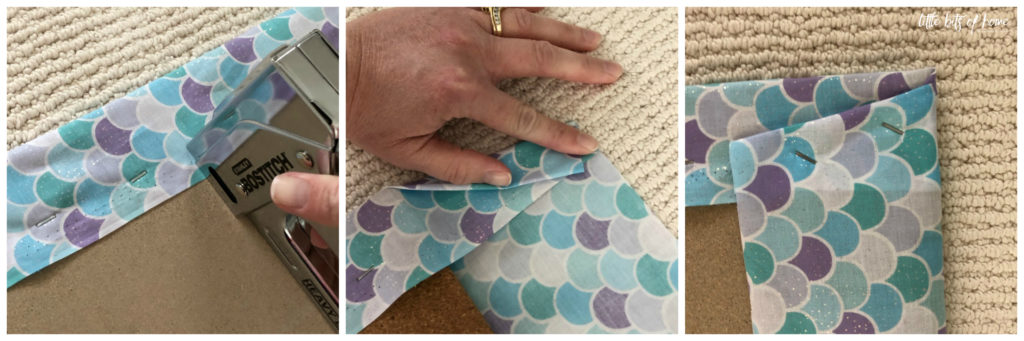
I worked my way around the perimeter, tightly stapling the fabric in place. I did a double fold for the corners to get a nice, crisp edge. Excuse my hands. I have terrible eczema! 😉
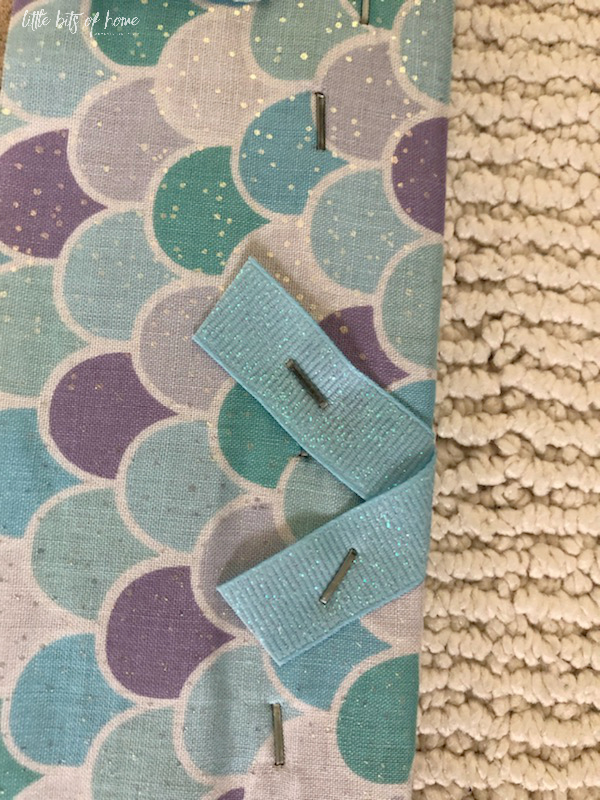
Next, I figured out how I wanted my ribbon to lay, then marked off my measurements, making sure the ribbon diamonds would be centered.
I wrapped my ribbon piece by piece around the board, securing with staples. I did it in small pieces to save on ribbon. Be sure to angle your ribbon (see below) as you pull around to the back so that it lays flat in the front.
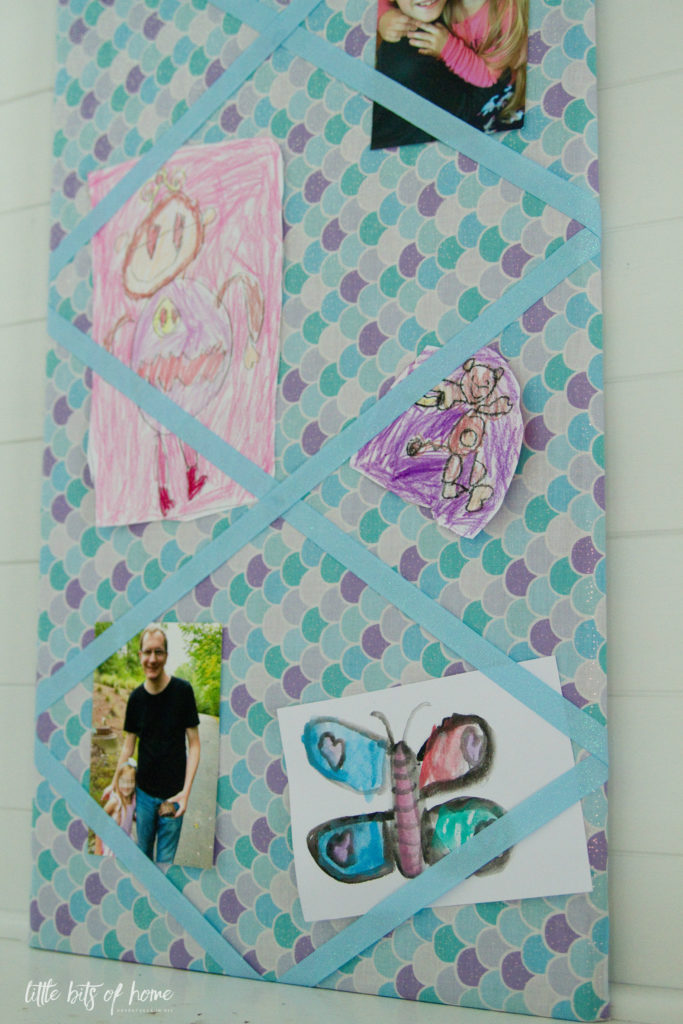
To finish it off, I tacked down the ribbon in the front where it crossed to keep things hanging on the board from falling through.
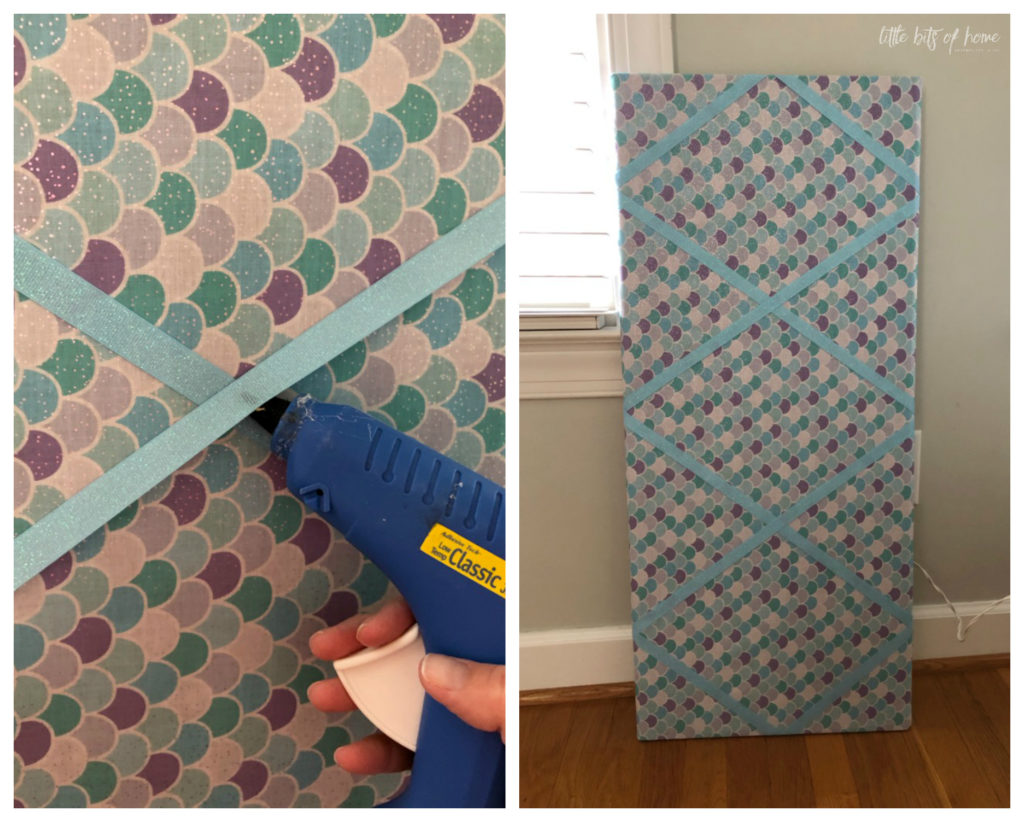
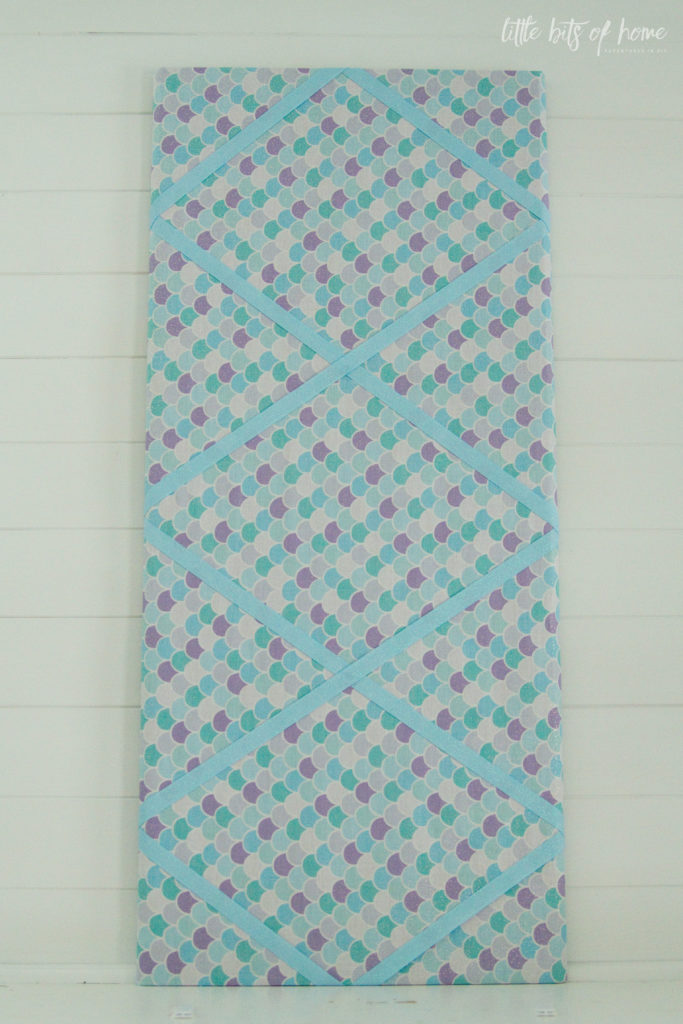
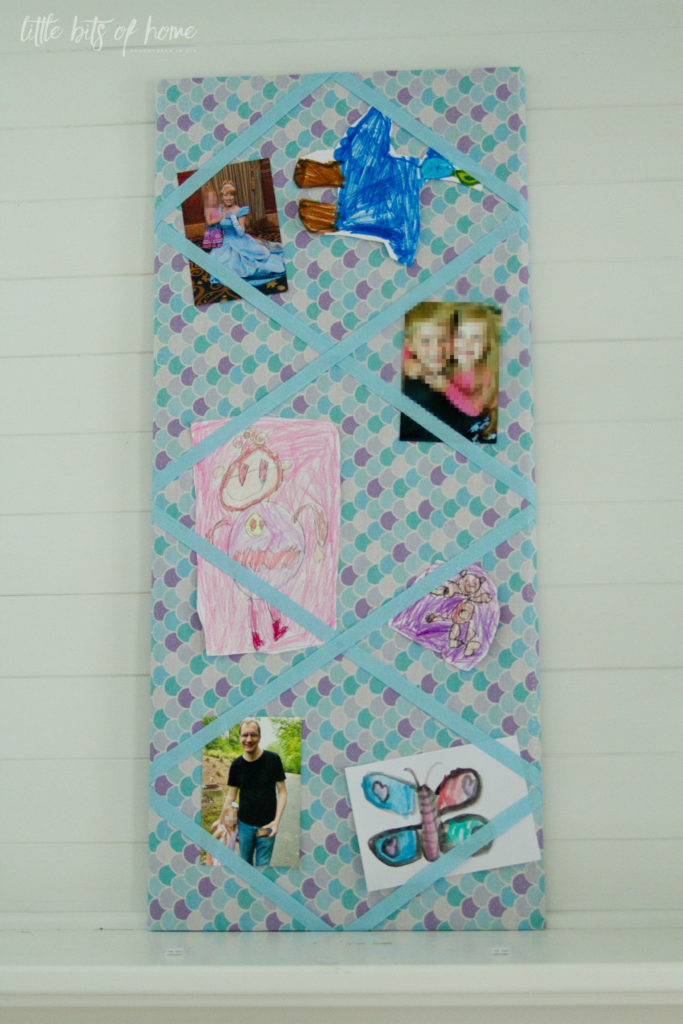
Here’s my finished board!
…which quickly got nice and cluttered up with pictures and drawings! Sweetness!
Yes, I know it’s obnoxious looking that I blurred my kids’ pictures, but you just can’t be too safe on the internet these days…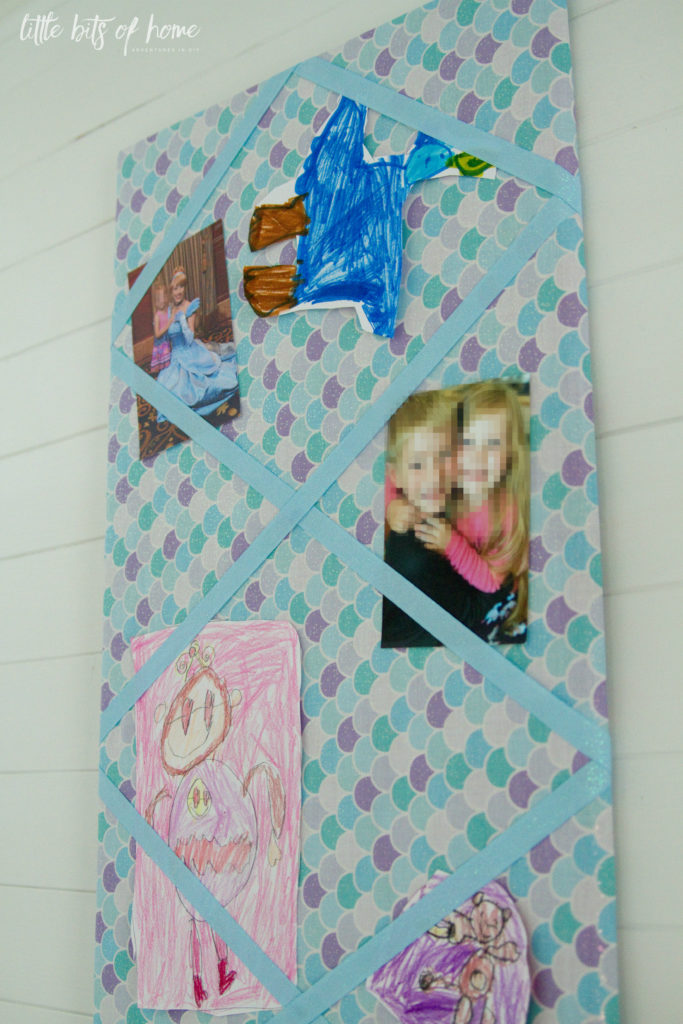
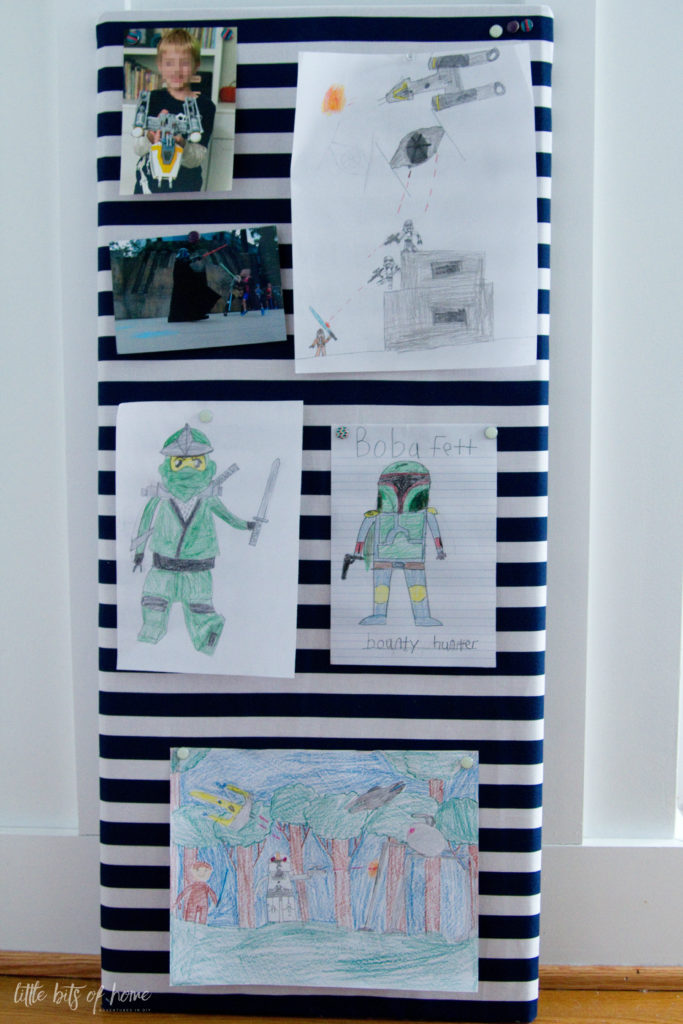
I made a second one for Little Man, but since he’s older, I left off the ribbon and let him use thumbtacks. His coordinates so well with his Star Wars room! Now I just need to get their boards hung on their doors already! 😉
Be sure to check out all the other creative DIY organization projects below!

”

Awesome job, Samantha! Looks great 🙂
My kids would love this!! I know you say its a message board but what a fun way to display kids artwork!! Thanks for sharing!
So dang cute! I love the fun colors in the fabric. Thanks for sharing such a great idea.
Such a fun idea! I bet the kids love having something special to hang their pictures on 🙂
Lovely project. Your kids must be very happy
This is so sweet. My daughter would love this in her room.
What a beautiful message board! I love the colors!
So easy to make and functional as well.
Such a great idea! Must do this for the boys room!!!
So cute! my kids love having their own space to hang things.
I am always in need of more places to display artwork and photos. So cute!
These came out super cute, love the fabrics you chose!